Showing posts with label 28mm. Show all posts

Saturday, December 30, 2023

30DEC23 Haydon Commandos Pt. 2


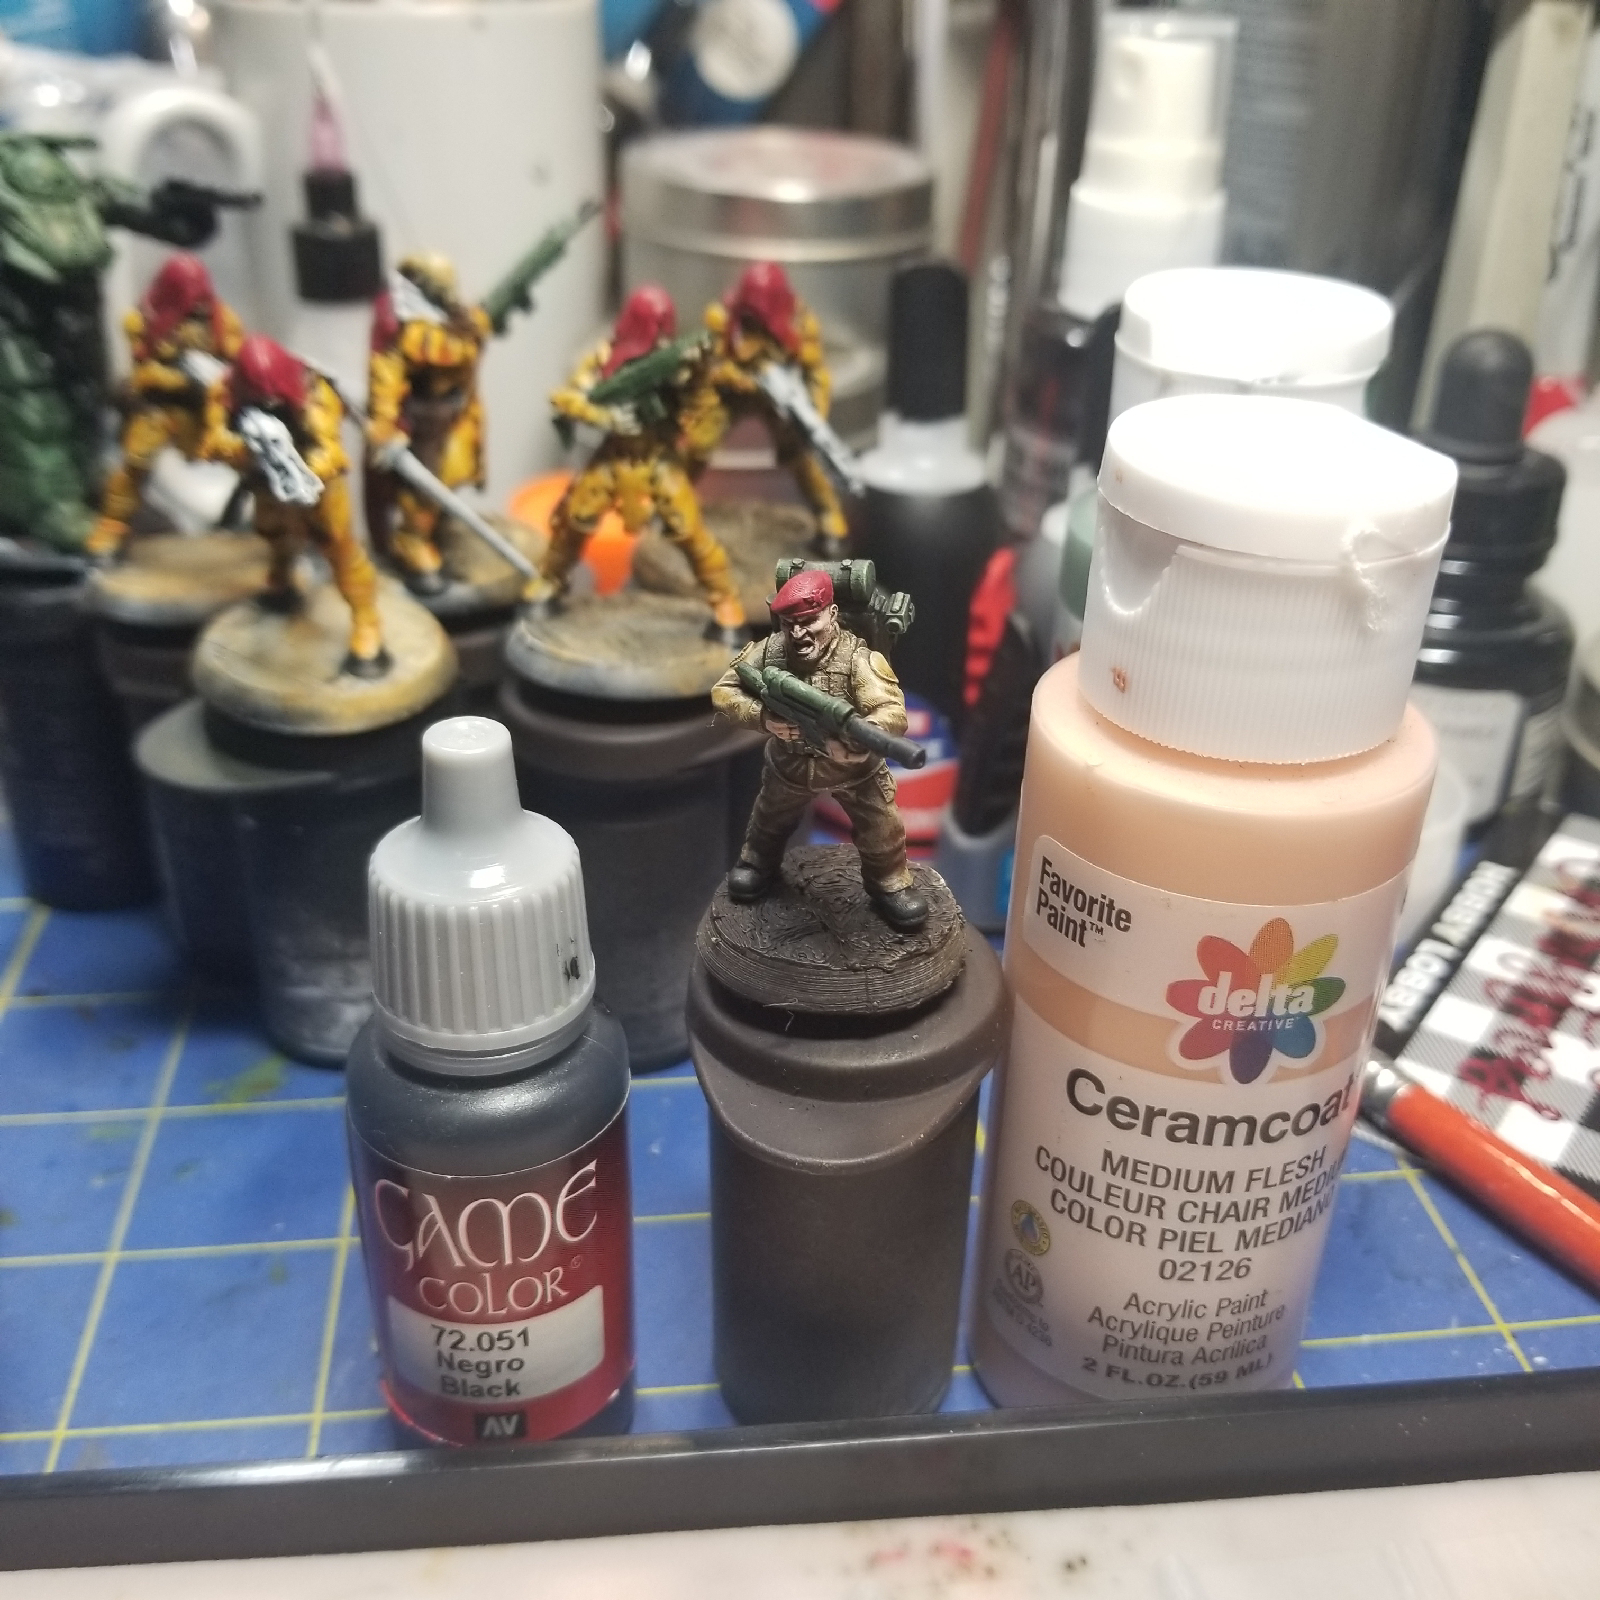
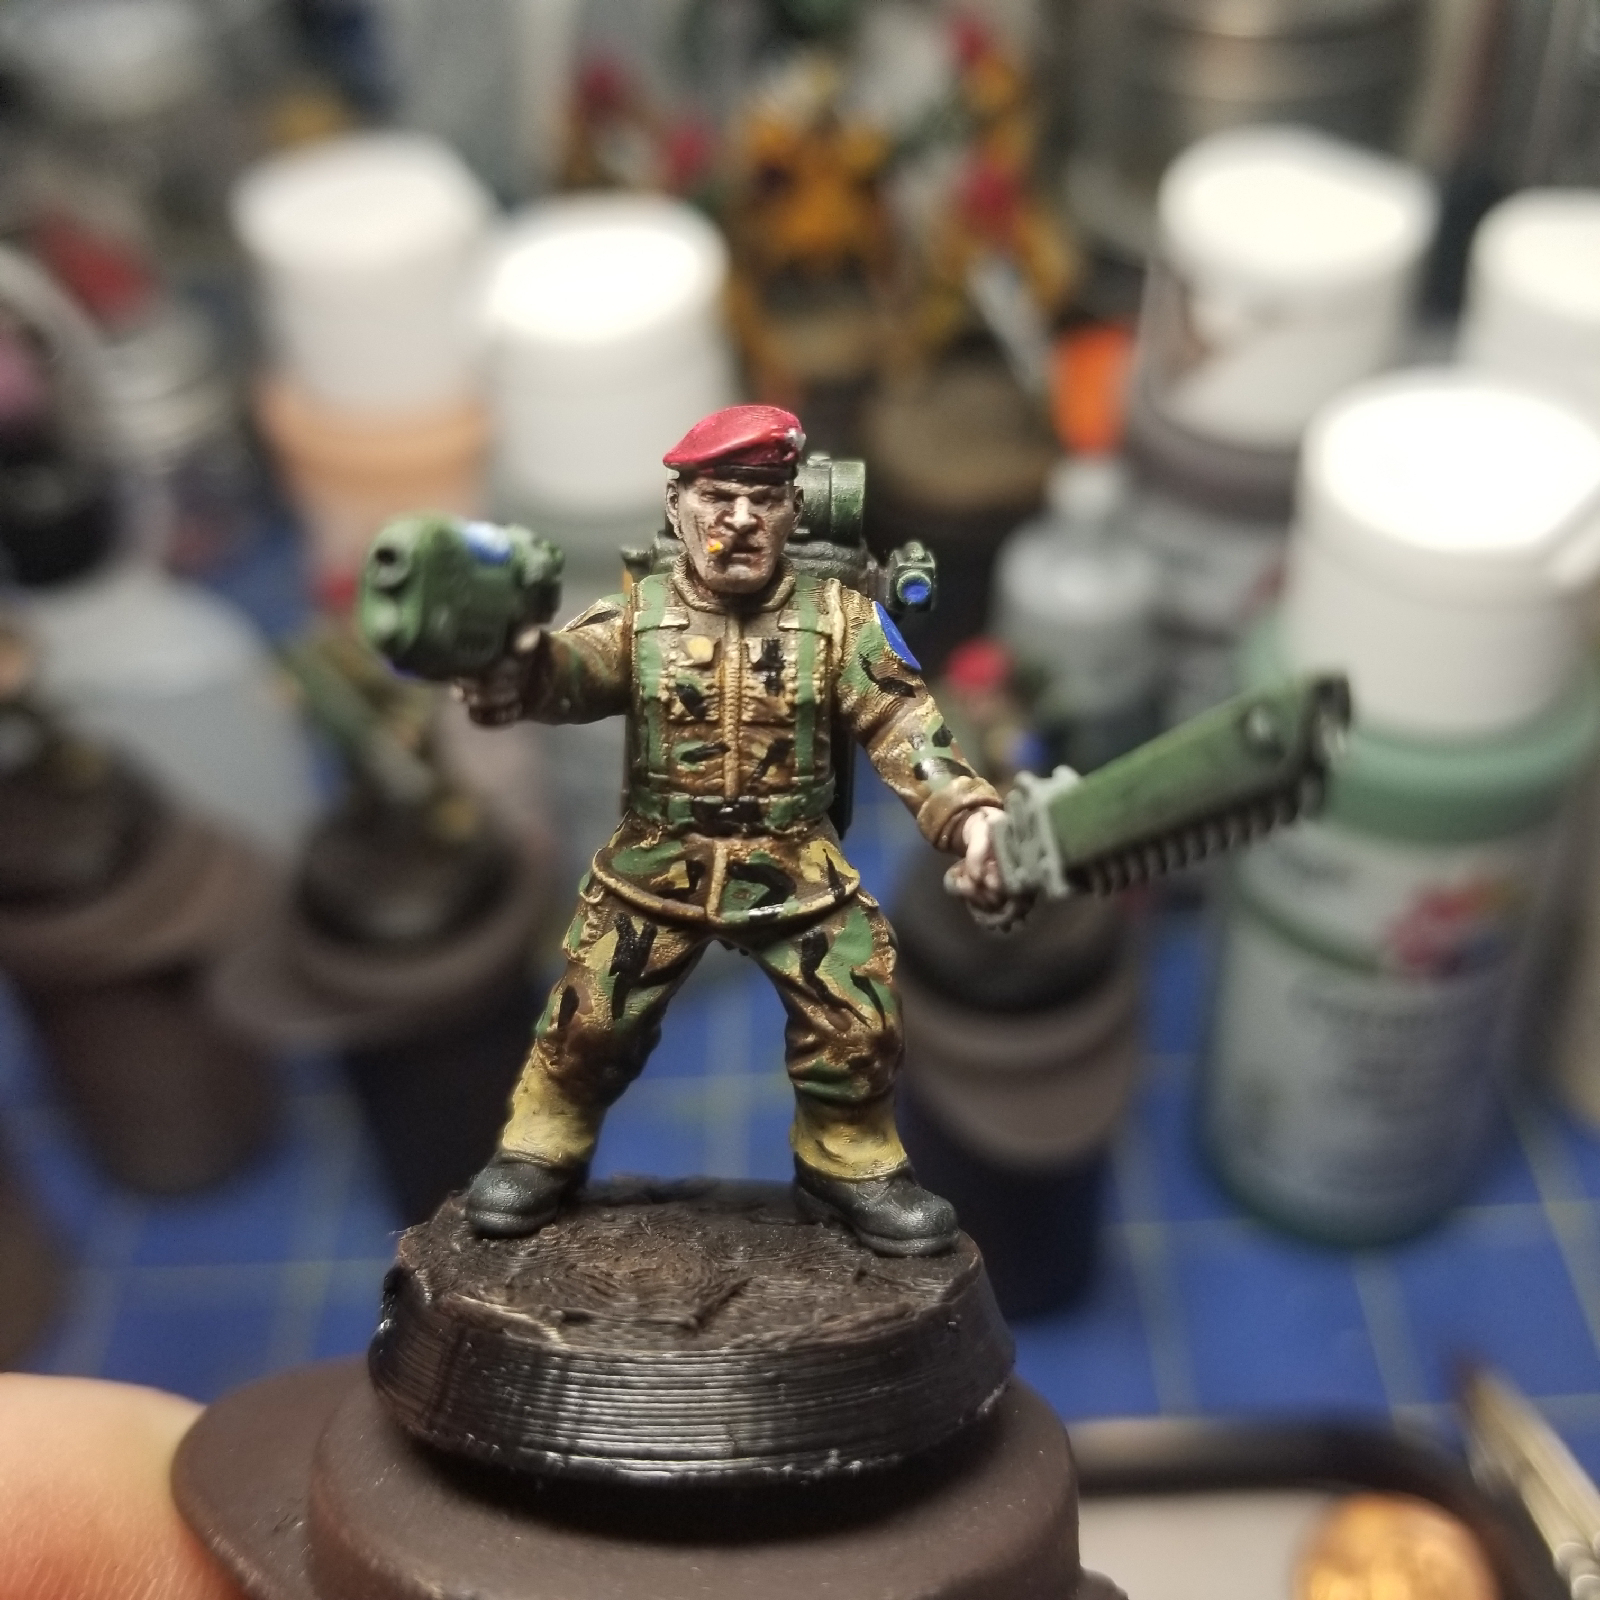
Figured I would start off with a photo of the nearly finished leader (in my mind, an NCO like a Sargent or Corpral equivalent).

My attempt to capture a 28mm scale UK DPM temperate climate pattern camo was...  Pretty OK.  Looks like my M81 Woodland in he same scale!  

Color selection for the major parts:
Medium flesh and black to pick out face, hands, an the headband of the berets.
Just that little touch of black went a long way!
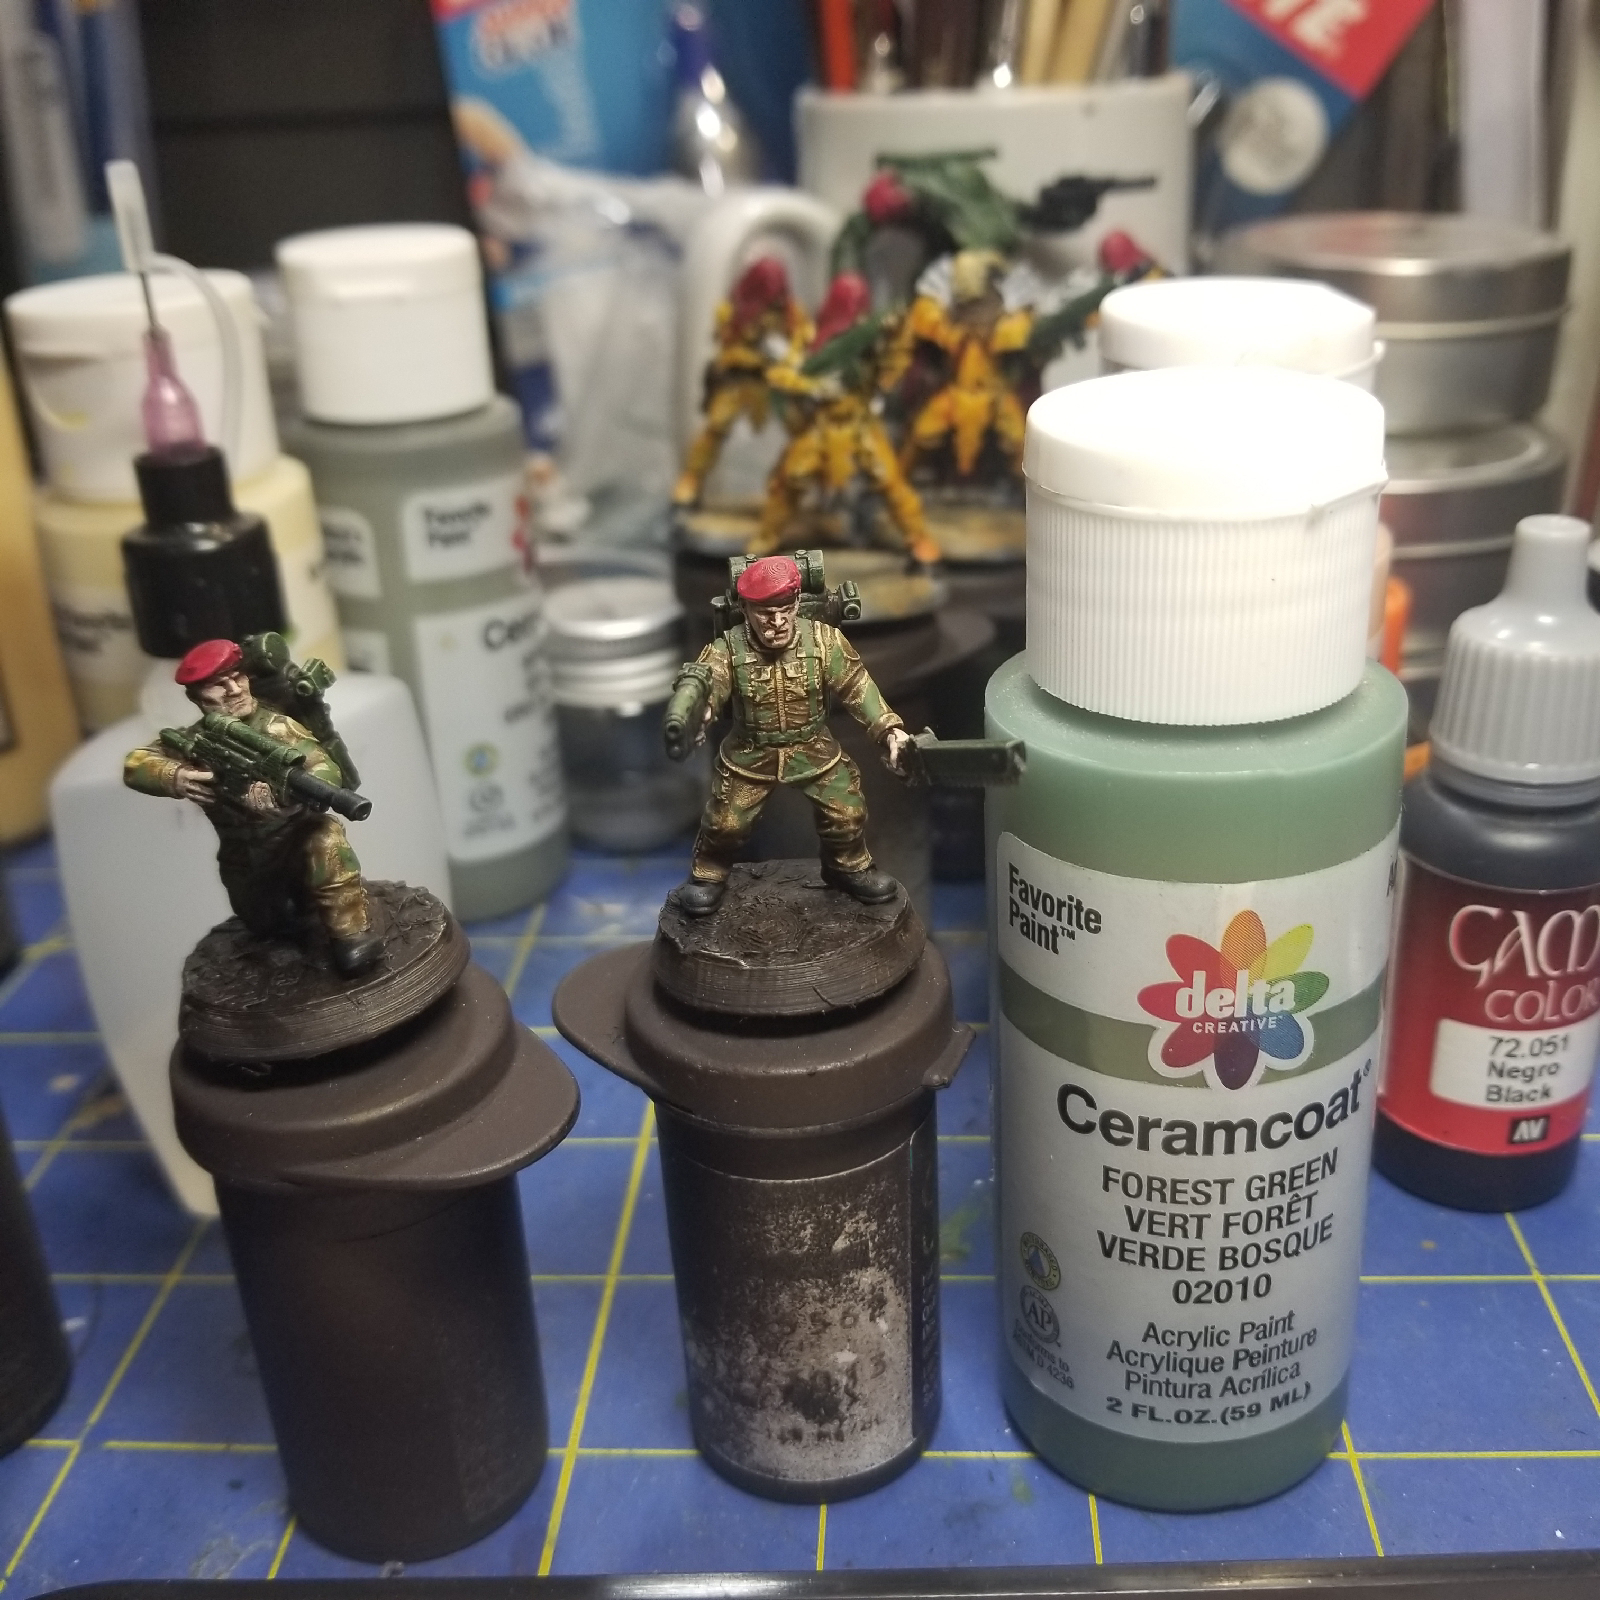
Forest green kicked off the start of the DPM splotches on the base of plaid bone.  
Followed by burnt umber.  Here I realized I hadn't added enough mid and high lights!
So I went with more khaki earlier, over the darker areas and the gators over the boots (as planned initially).  I probably should have started on the khaki as a base coat, this paint is translucent enough!
Back to black for camo splotches and picking details like buckles.
Hippo gray made good Las barrels, scopes, and battery mags.
Ivory was applied to the patches and lenses.

Finally, I went back and detailed with every color and few others to tighten things up and finish.

Friday, January 1, 2021

01JAN2021 Paper BMP continued (Part III)

 As promised, albeit too many months later (and at 2AM on the first day of a new year), I have returned to bring some more paper craft goodness to the blog.

Today, I'm going to show some photos of my laminating process and some of the details that worked, and some that didn't go as planned...


Figured I'd show a couple things that didn't initially go well, namely the vents.  For these I attempted to use regular typing paper of my templates and slice slots where I would insert a flat object while the paper was wet and drying on the hull.  It sorta looks like vents, that got stomped on by a careless soldier during a hail storm...  Yeah, I'll find a way to make good looking paper vents...  Someday...  Until then, don't do this.


Next up, this is what worked.  I guessed, and made a good assumption, about the thickness of card the next few details needed to be when they got glued onto the hull, and on top of each other.  Wicked simple, realistic, and just damn good looking.  Sometimes you just have to wing it and guess how thick you want each layer in a detail to be, or replace the paper with a found object like a cotton swab stick, toothpick section, or candy stick (for cylinders).  Next up I used a toothpick to carefully dab a drop of glue onto each rivet head detail of each layer of detail.  Again, you have to think ahead a few parts and try to add such rivets to the lower level of lamination before adding parts on top, otherwise you might not be able come back and get those rivets in place because your tool wont fit in some spots!


Tracks were pretty easy and strait forward, just tedious.  I cut out the strip on a single sheet of index card stock for the base of the track.  For each tread, I cut a strip from my cereal box stock the with of the tread pad, and then cut hundreds of strips to glue into place on the track before wrapping them around the road wheel/drive/idler assembly (thankfully those weren't individual details as well...).


Finally, we get to start making magic happen.  Here I used a dark burnt umber while assembling to get the lower recesses that gave me a hard time the first time I built this model (seen in the background in a few places).  By the time I got to the third one, I just left the tracks assemblies off completely until everything was painted!  Learning to think ahead by pre-assembling saves time later as you find these recessed areas and pre-paint before assembly (especially the insides of gun barrels and exhaust tubes...).


Tuesday, September 22, 2020

22SEP2020 - Paper BMP Part II

 So for this part of the build, I will go over my work on building up the main hull of the MICV, the "metal bawx!" to quote a certain Dawn of War: Soulstorm Chaos Space Marine leader...  

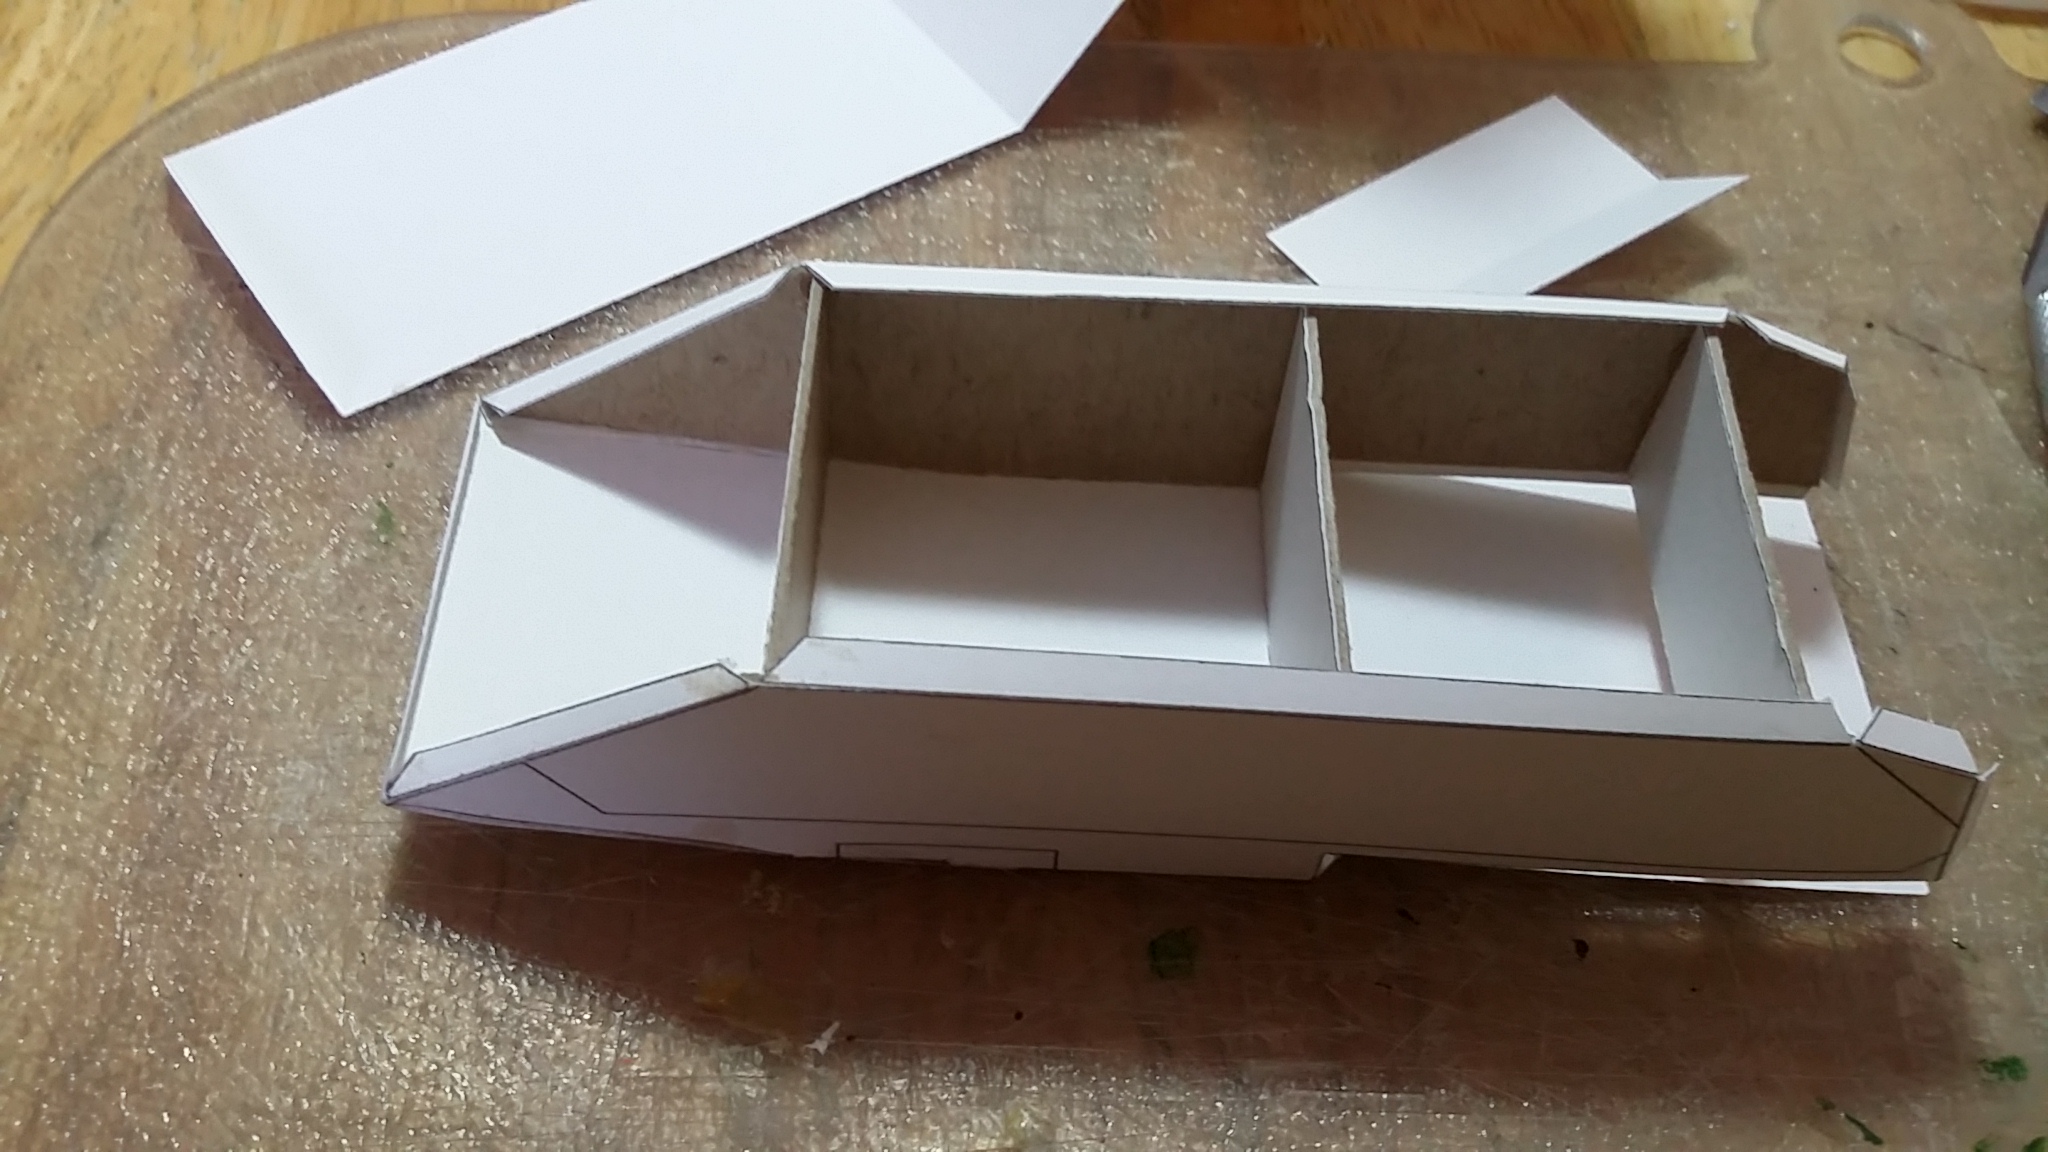
First off, this design is great as Patoroch designed some interior supports right off as your first parts.  These I originally printed on regular typing/copy paper and ended up using the glue stick to attach to some incredible cereal box type card or chip board.  It came from a food box, so, I have no 'craft store' or 'art store' term for it.  Treated right, this really stands out as a great foundation for the rest of the build to attach to.  In fact, other components showed some warping as a result of me not using this again in other places...


As you can see, that cereal box provided a very sturdy 'skeleton' on which to flesh out this armored vehicle.  Best part of armor building is that it truly is nothing more than figuring out the geometry of a box, and then adding greebles from there.  For this BMP, that was the rear of the hull where there is another box in the form of the upper rear hull where the weapons ports exist for the infantry dismounts to stick their barrels out of and engage the enemies on the sides of the vehicle (and as you can see, there are also two ports to the rear for such a reason).  


Now that the main hull box and the rear hull are attached, I add the side armor that provides the basis for the tracks to be applied.  This is our first step in laminating.  My analysis of the pattern and assembly led me to conclude this part needed to be a bit thicker than even my card stock.  So I glued the card stock part to the same cereal box card as my skeleton to form a thicker armor sheet on the sides of the hull to mount the tracks and other features.


Here we conclude this portion of the build workflow.  Keep the idea of lamination in the back of your mind though!  We will return to this later, a lot, I promise!

Monday, September 21, 2020

21SEP2020 - "Paper tiger" - BMP inspired "count's as" Chimera by Eli Patoroch

 Over the last couple of years I have been very deeply involved in building a lot of armor for the gothic SF universe Warhammer 40,000 (WH40K).  40K gamers are familiar with the cost of doing so, and would be surprised to find that for less than $100 USD I have been building just about non-stop without buying a single kit.  No, I download a design and print it out on nice card stock and start building it.  I spend months building a single one at times and proudly post my work on Zealot, Cardboard Warriors, and Facebook in the relevant Groups.  Part of why you rarely see hobby post here...  Sorry...  I'll try to do better!

Please take a moment to peruse the desktop printer compatible designs on the linked pages!  They are incredible, and will forever alter your perception of that humble piece of paper when combined with the right card thickness and reinforced with your morning cereal box.

Step one to any such project, find a printable template to build!  My first, project was created by a talented Ukrainian artist Eli Patoroch.  He wasted no time in combining features of Games Workshop's Chimera and it's source inspiration, the Russian BMP-1/2/3 series of Mechanized Infantry Combat Vehicles (MICV).  His template can found on the following Google Drive link, or you can search Zealot or the Facebook group I listed above.  For American/North American readers who have to use US Letter size paper, you can scale this down to about 96% to get the template to fit on our shorter but wider sheets.  I recommend 100#/271gsm for card stock weight.  Since building this, and scaling it, I've found an a US source for ISO A4 card stock that is close to that weight.  


Prior to finding the A4 size paper, this was the cardstock I used and scaled my templates down to.  After printing them, use a clear matte or clear flat spray coating on the printed templates.  Be liberal with how much you use, let one side dry, flip, and apply to the other.  I have found this does a wonderful job of eliminating much of the warping that occurs when you use glue.  It does not eliminate all of that, but I will get into that in much greater detail later.  I discovered this trick when I acquired some Dave Graffam models and read his Paper Model Guide which you can acquire freely on Wargame Vault.  This little tip opened the possibilities of papercraft as much as discovering how cosplayers build armor out of paper and coat it in epoxy resin before adding fiberglass and autobody filler.  This was the missing tool in my paper building skillset I so critically needed to discover!


Different project, blurry, but you get the picture.  Krylon Satin Finish or similar, and don't forget ventilation and a good face mask!  Mine has seen a lot of use given the scarcity of face masks lately, it only reinforces the need for good ventilation for this step.  Otherwise, your tools are much more simple.


Most of your basics: quality glue stick, quality PVA glue, good ol' No. 11 hobby blade, a ball end tool (smallest diameter you can find), and a strait edge (or three).  Different template than the BMP, same process building!


Why the ball end tool you may ask?  Two reasons.  First: every fold gets pre-creased with the ball end tool.  No matter which way I fold (mountain or valley fold), it will fold nicely with the tiniest of radius smaller than the thickness of the other material around it.  Second: details such as seams or gaps between armor panels, lightly depressed areas around view ports, and other such details get some treatment from the ball end tool.  This takes some time to analyze your build process to nail down just what exactly you need to do.  Patoroch models mostly come with an assembly drawing, normally without all the views you (think) you need.  Keep reference pictures handy in your search engine on a device near your workbench!  


That is all for now folks!


Sunday, November 24, 2019

24NOV19 Continuing and Finishing the Fire Giant

So, continuing reight along here I have my lower body painting process documented with pictures.  My chain mail rendering leaves much to be desired at this point, and so far...  My dry brushing got away from me and got into the depressions and didn't stay on the surface as desired...  So, going to bac to learn that method in the future, at least with chain mail!


I was quite happy with my mix of orange and yellow for the bronze and the use of three layers of turqoise for the gems.  Sure, being a Fire Giant maybe I should have gone for reds and other warmer colors...  But I like the contrast better this way.  Blame too many hours of Skyrim?


Here is the euipment belt with the knife in detail.  Three shades of just about everything but the leather.  I lighted all the paint with Ivory instead of white, and so far have never been upset at the results.  Always tends to leave me the option to highlight (either the color I mixed with Ivory mixed with white instead, or in the case of the knife handle that was painted Ivory, just white on the Ivory) with white paint later for the really shiny materials later!

Pre-final assembly, Giant and his loot for the discerning delving party to (try) to aquire from him.
Assembled and looking pretty sharp there!  Pardon my poor photography here.  That is in the works...  Base is pretty basic, just a simple 50mm round I found on Thingiverse and 3D printed for now.  I'll try to find, or make, a suitable dungeon style base in the future!


Detail of his face.  Hair was a base of Raw Sienna with orange (fire) highlights to drive home the Fire Giant heritage along with the red eyes and soot black skin.

Fire Giant stands heand and shoulders over the others!  Looks better than the earliest miniature I painted (up front, a GW LotR, second row back would be Reaper, with a WizKids Deep Cuts Fire Elemental [posted earlier] on the left and a Reaper Bones Minotaur on the Right).