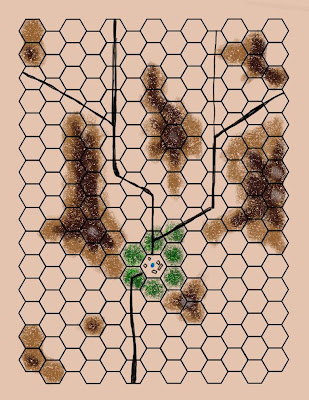
I did it! I finally combined Inkscape (to do the hex grid) with GIMP (to turn the .png exported from Inkscape into a multi-layer Photoshop Document .psd file) so I could use Painter X to paint the background! So, you have a small village with the well and a battle field with several choke points to fight over. So far, no numbers yet...
Nuts and Bolts (short version):
1. Using Inkscape, I made a .65 inch high hexagon with .03 inch width stroke for line weight. I also made sure my document preferences were for US Letter size paper... Important! Inkscape defaults to A4, most of its development is done in Europe! When I was happy with where my hex grid was, and its alignment, I exported the entire page to .png format which allows RASTR editors like Photoshop or the GIMP to read it as a picture instead of a scalable vector graphics (.svg) file.
2. Using the GIMP (or Photoshop if you are rich enough, I know you aren't a pirate, if you are you need to try the GIMP... I've used the CS Demo and I'm not impressed with Photoshop...) I loaded the .png file. It starts out as black lines on a transparent sheet! Thats fantastic! Thats what makes it handy! I added another layer that was opaque white and moved it behind the hex grid. If I wanted to, I could start making my maps now by working on layers underneath the hex grid! After getting the background in place, I saved the file as a Photoshop Document (.psd).
3. Finally, I loaded the .psd file into Painter X. Painter X put up a background layer called 'canvas' behind my white background, so I deleted the white background and proceeded to add layers and build my map. Finally, I saved a copy in the .RIFF format for further editing using Painter X and exported a copy as a .jpg which we see here!
There you go, baby steps! Turning terrible twos!